docker 部署web应用
一、创建网络
创建一个指定子网ip的网络
docker network create --subnet=192.168.0.0/16 --gateway=192.168.0.1 -o com.docker.network.bridge.default_bridge=true -o com.docker.network.bridge.enable_icc=true -o com.docker.network.bridge.enable_ip_masquerade=true -o com.docker.network.bridge.host_binding_ipv4=0.0.0.0 -o com.docker.network.driver.mtu=1500 mynet |
二、创建web容器
docker run -p 9001:9001 --name web --network=mynet --ip=192.168.0.6 --dns=114.114.114.114 -it -v h:/df/web:/var/web centos /bin/bash |
–name web # 将容器命名为web
–network=mynet # 使用第一步创建的网络
–ip=192.168.0.6 # 固定容器的ip
–dns=114.114.114.114 # 指定dns
-p 9001:9001 # 端口映射
-v h:/df/web:/var/web # 将容器的/var/web目录挂载到主机的h:/df/web目录
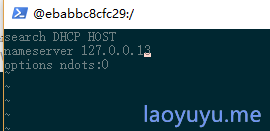
如果是指定了ip地址的网络,需要指定dns,否则会出现连不上网的情况
也可以在容器中修改dns,修改nameserver为114.114.114.114
vi /etc/resolv.conf |

简单测试应用
# coding=utf-8 |
2.1、uwsgi配置
pip install uwsgi |
注意:如果nginx使用的是http代理,那么你应用以http的方式启动uwsgi;
如果你希望还是以socket 方式启动uwsgi,那么在nginx中,你需要使用socket转发请求。
[uwsgi] |
常见错误:
invalid request block size
nginx的代理方式和uwsgi启动方式不一致
2.2、后台方式启动uwsgi
启动web容器
docker start web |
启动uwsgi
docker exec -d web uwsgi -i /var/web/config/test.ini |
2.3、配置supervisor
使用supervisor来管理uwsgi进程
pip install supervisor |
配置supervisor
# 在主机的挂载目录中创建supervisord.d,用来存放supervisor配置 |
修改配置
vim /etc/supervisord.conf |
退出容器,执行命令后台启动
docker start web |

三、创建nginx
创建nginx,并将16800端口映射到nginx容器的80端口,并使用第一步创建的网络
docker run -p 16800:80 --name mnginx --network=mynet --ip=192.168.0.1 -v e:/docker_file/logs:/var/log/nginx -v e:/docker_file/nginx/conf.d:/etc/nginx/conf.d -d nginx |
–network=mynet # 使用上一步的网络
–ip=192.168.0.1 # 固定nginx在网络中的ip
-v e:/docker_file/logs:/var/log/nginx # 将容器的nginx日志目录挂在到主机的e:/docker_file/logs目录下
-v e:/docker_file/nginx/conf.d:/etc/nginx/conf.d # 将容器的nginx配置目录挂在到主机的e:/docker_file/nginx/conf.d目录下
nginx 配置
server { |

参考地址
docker 部署web应用


